APAR Tool: How to Complete Your Annual Program Assessment Report
Logging In
- Go to https://apar.es.uh.edu/
- Click “Login using cougarnet” to authenticate if necessary
Navigating the Portal
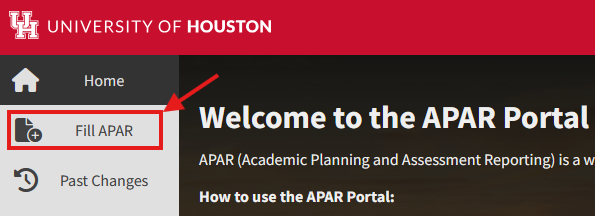
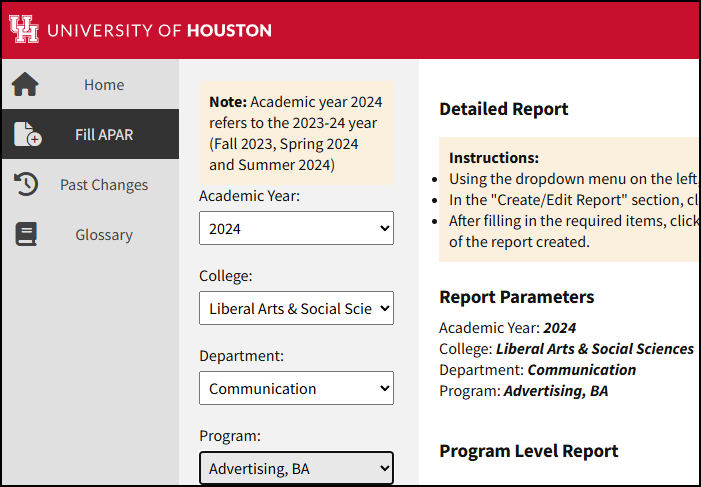
- Click the “Fill APAR” link in the left sidebar
- Using the dropdown menus, select the Academic Year, College, Department, and Program as appropriate.
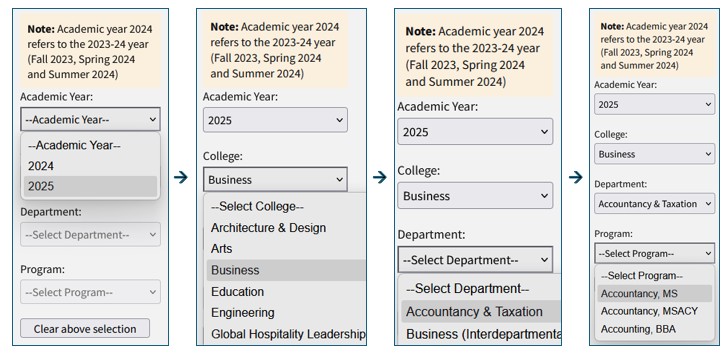
Note: Academic year 2024 refers to the 2023-24 year (Fall 2023, Spring 2024, and Summer 2024)
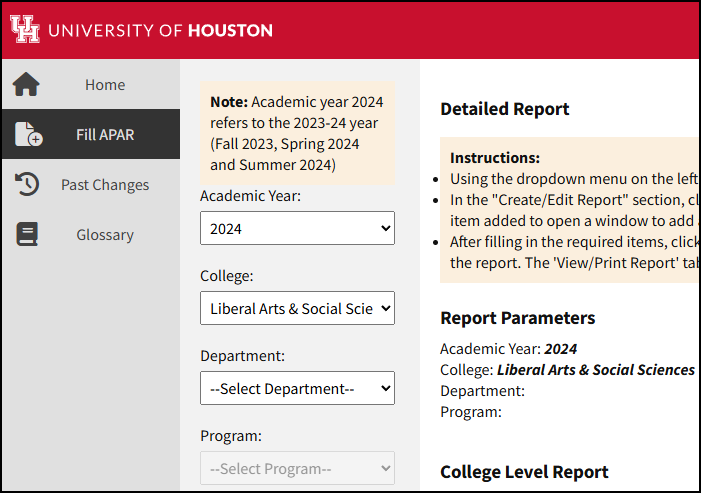
- Select academic year and college
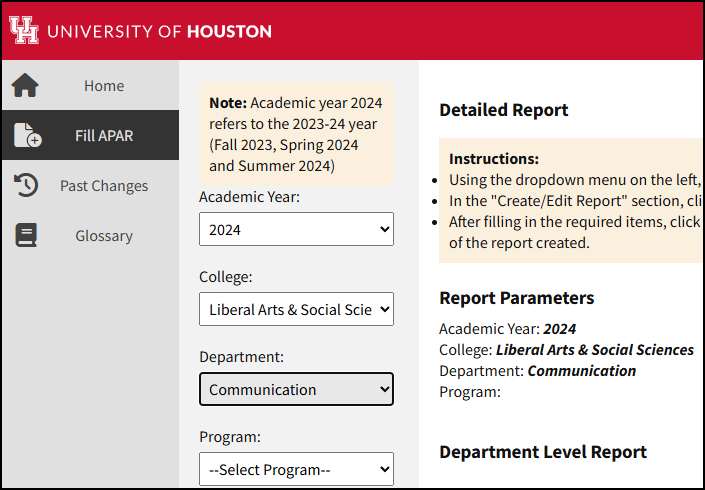
- Select academic year, college, and department
- Select academic year, college, department, and program
Completing an APAR
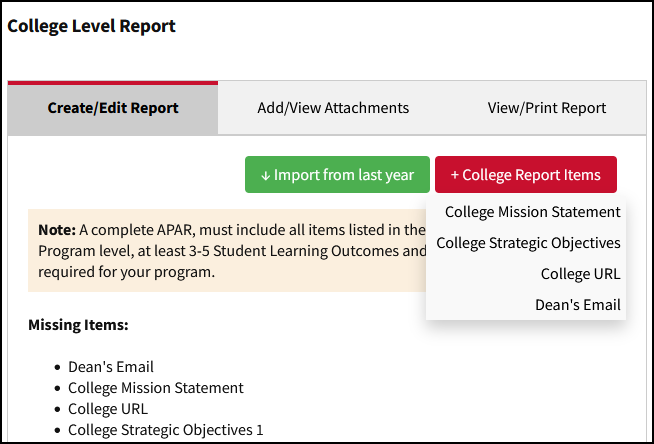
After navigating to a report, you will see the screen with the list of items for that report level. New/blank reports will show the minimum set of required items under the Missing Items heading.
- Mission Statement
- Strategic Objectives
- College URL
- Dean’s Email
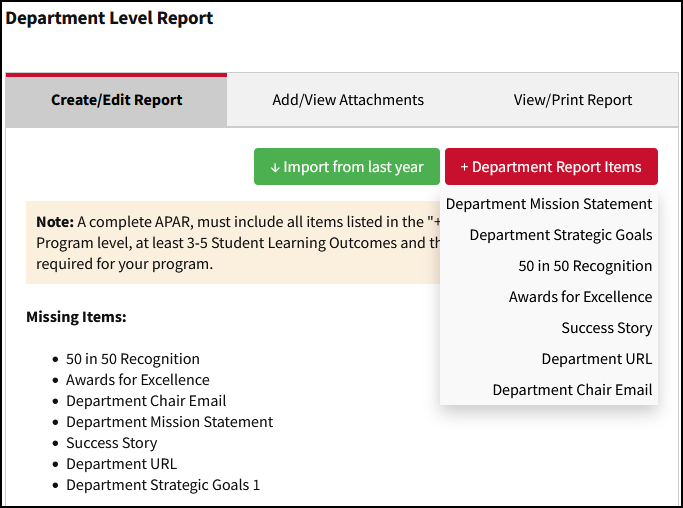
- Mission Statement
- Strategic Goals
- 50 in 50 Recognition
- Awards for Excellence
- Success Story
- Department URL
- Department Chair Email
- Mission Statement
- Student Learning Outcomes*
- Program Outcomes**
- Program URL
- Program Director Email & Name
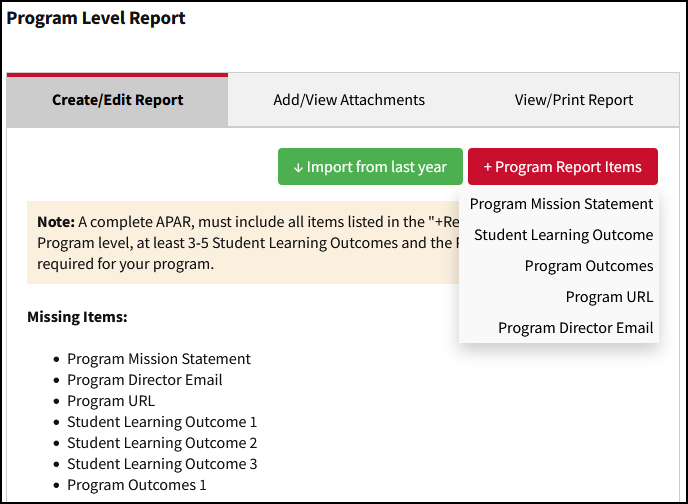
* A minimum of three (3) Student Learning Outcomes are required for each program.
** All undergraduate programs must have the following two required program outcomes:
Program Outcome 1 (Student Achievement – FTIC Undergraduate Graduation Rate):
The percentage of a First Time in College bachelors (or equivalent) degree-seeking cohort who graduated within six academic years or less.
Program Outcome 2 (Student Achievement – FTIC Undergraduate Retention Rate):
Percentage of First Time in College bachelors (or equivalent) degree-seeking undergraduates from the previous fall who are again enrolled in the current fall.
All graduate programs are required to include a program outcome addressing the number of graduate degrees awarded per academic year.
All programs with mandatory licensing requirements must include a program outcome addressing licensure/board pass rates.
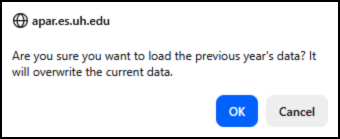
The “Import from last year” button in the Create/Edit Report tab will copy all sections from the previous year for the selected report.
- If the currently selected program has no information saved for the previous year, the system will display the message “No record found for the previous year”.
- Use with care! This is a destructive operation that will replace any items you have already entered for the currently selected report and year.
- Changes made to imported data will not alter prior years’ data.
Remember that you must update your data after importing from last year!
Note: While this example uses Program-level reports, the same process applies at all report levels.
Workflow:
1. Click the “+ Program Report Items” button and select the item you wish to add.
2. Click the item title to open the newly created item.
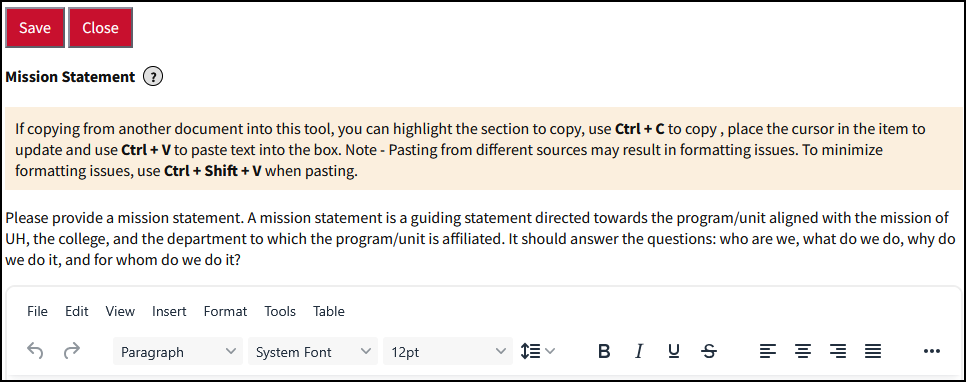
3. Enter the information into the fields and click “Save.”
4. Repeat 1 & 2 for each additional item until all items have been entered.
5. Generate the report and verify that everything appears as intended.
Tips:
- Items will not be saved until you have entered information and clicked “Save.”
- Complex structures such as tables may not format correctly when copy-pasted.
Click the “+ Program Report Items” button to reveal the menu. Select the item you wish to add, and it will appear in the list below. Click the item title in the list to edit the item.

In the item editing page, enter the information in the editor window that appears. Click the “Save” button to save changes and close the item. Click the “Close” button to close the item without saving changes.
Note: If you create a new item and click “Close” without saving it, any information you entered will not be saved in the system and the new item will not appear in the list of report items.
- Items that appear in the report once (e.g. URL, email, mission statement) can be entered in any order.
- Items that are used multiple times in the report (e.g. Student Learning Outcomes and Program Outcomes) will appear in the report in the order they are created. For example, the first Student Learning Outcome you create will appear as “Student Learning Outcome 1” and will be printed first in the Student Learning Outcome section.
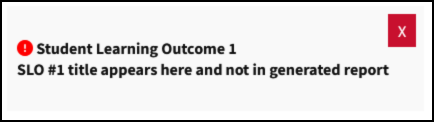
Certain items such as Student Learning Outcomes and Program Outcomes have a title field. Titles are displayed in the APAR Tool interface so you can easily locate a specific item, but the titles are not included in the generated reports[1]. For example:
[1] Title field values may eventually be limited to a pre-determined list for reporting
purposes. Values entered here may be changed by the Office of Institutional Effectiveness.
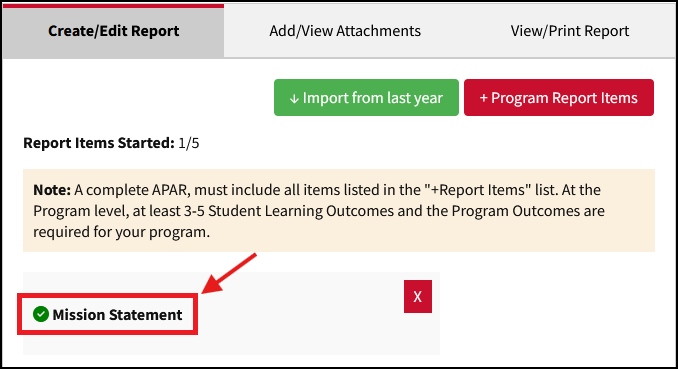
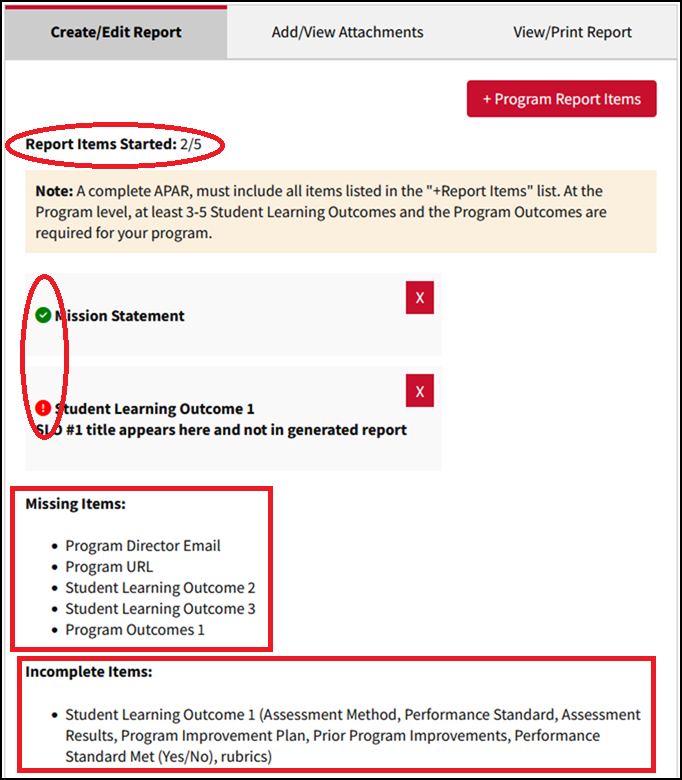
The Create/Edit Report tab includes various elements to help you quickly see the status of various items in the report such as the number of items started, which items are missing, and incomplete parts of each item.
![]() Checkmark in a green circle indicates all fields in the item have been entered.
Checkmark in a green circle indicates all fields in the item have been entered.
![]() Exclamation point in a red circle indicates that one or more fields in the item have
not been entered.
Exclamation point in a red circle indicates that one or more fields in the item have
not been entered.
The Missing Items section shows the minimum list of items that must be included in the report for it to be considered complete.
The Incomplete Items section lists the items that are not complete along with the specific fields/items that need to be completed.
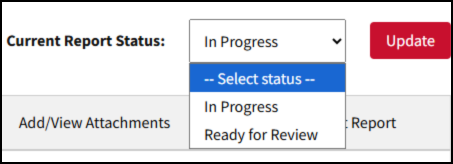
Each report has a Current Report Status:
- In Progress: This status indicates that the report is being worked on. This is the default status that is automatically set once you create an item for a new report.
- Ready for Review: This status indicates that you have finished the report and it is ready to be reviewed by the Institutional Effectiveness team.
- Completed: This admin-only status is selected by the Institutional Effectiveness team after the final review is done and no additional changes are needed. Reports with Completed status are locked and can no longer be edited.
When editing a Student Learning Outcome (SLO) you can include rubrics in the Rubrics (Optional) field at the bottom of the SLO editing page:
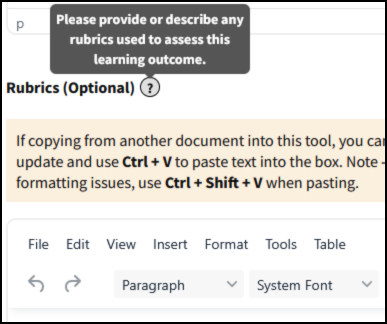
Information entered in this section will be included in the generated report at the end under headings “Student Learning Outcome 1 Rubric”, “Student Learning Outcome 2 Rubric”, etc.
If you include your rubric in other sections of the SLO and leave the Rubrics (Optional) field blank, the SLO item will appear with a red exclamation mark; however, this will not result in the item being listed as missing or incomplete.
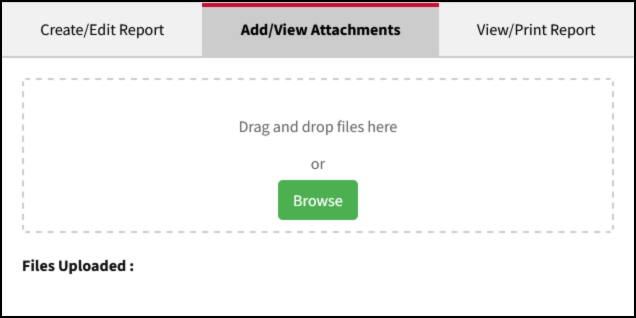
Attachments may be used to upload files relevant to the report. These files may be viewed in the system and are linked in generated reports; however, the contents of the attachments are not included in the reports.
If the contents of an attachment need to be printed in the report (e.g. in the case of rubrics) you should put the content in the appropriate item entry field(s).
Click the “Generate Report” button to create a new report based on the currently saved data for the currently selected college, department or program.

Next, click the “View HTML” or “View PDF” buttons to view the generated report in that format.
The report will appear in the list with a date/time stamp corresponding to when you clicked Generate Report, as shown below:
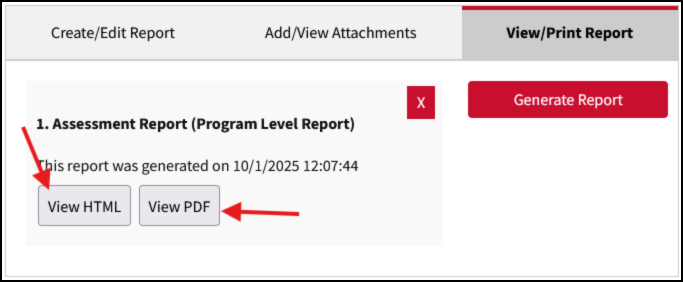
Reports in HTML format will open in a new browser tab/window.
When you click “View PDF”, the system will generate a PDF file and download it to your device. Normally this will open in a new browser tab/window. If the report does not open automatically, you can find the generated file in your default download location (check device/browser settings for details).
Although the data you enter is saved on the server, the HTML and PDF reports are generated on demand and are only available during your current session. They are not retained on the server, but are cleared when you log out, click the “Clear above selection” button, or manually delete the report listing.